how to keep your lunchbox cold
You wake up, hit the alarm, and rush to get the whole gang dressed and ready for school. In the scramble, you somehow manage to throw together a lunch so that your kiddo gets the most nutritious, delicious food out there. Then you freeze. Where is their ice pack? You unzip their bag to find it sitting out at room temperature. But don’t fret! You can stay cool, calm, and collected with just a few DIY projects.
Nowadays, getting lunches packed is only half the battle. You also have to keep them cold and safe to eat when your child hits the lunch room. Buying multiple ice packs can add up, but it’s never a bad idea to have a backup (or a backup to your backup) in case things go awry. Here, we share a few ways to make your own ice packs from sponges and other household items in case you need them in a pinch.
DIY sponge ice-packs
One of the simplest ways to make sure you have something on hand to keep your star student’s lunch chilled uses basic kitchen items (and just a little planning ahead!).
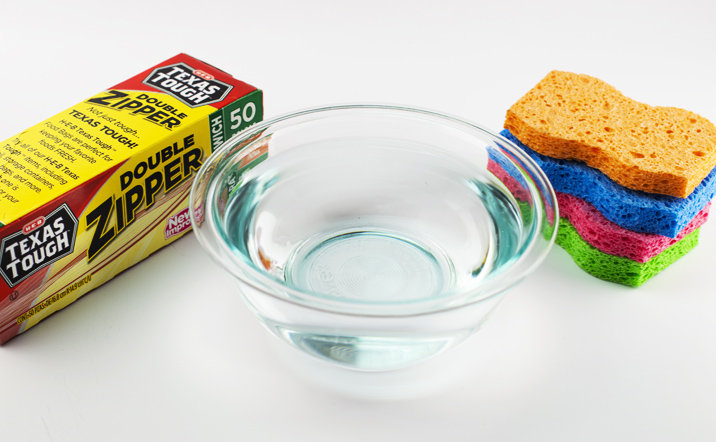
What You'll Need:
- Sponge
- Plastic bags
- Glass bowl
How You'll Do It:
- Fill a bowl with cold water.
- Submerge a sponge in water until it is fully soaked.
- Taking care to make sure that all the excess water falls off the sponge, but that the sponge is still soaked with water, place the fully wet (but not dripping) sponge in a plastic bag with a zipper.
- Make sure all of the air is out of the bag and then place the sponge and the plastic bag in the freezer overnight.
DIY dish soap ice-packs
When you freeze liquid dishwasher soap, it doesn't freeze like a solid, but instead it forms a sort of gel for the closest take on a traditional cold compress. It's a quick, simple, (and cost effective!) process, and whole lot of fun so whether your kids are just starting school or middle-schoolers, they'll have fun pitching in.
What You'll Need:
- Plastic bags
- Measuring cup
- Dish soap
- Drinking glass
- Food coloring
How You'll Do It
- Start by lining the inside of a glass with a plastic bag, taking care to ensure that the zipper is guarded so that no excess detergent makes its way into the zipper. If any of the dish soap comes out, it could end up in your lunch!
- Using a measuring cup, add 1/2 to 3/4 cup of dish soap to the empty, open bag.
- If you want to make a colorful ice pack, you can add 4-5 drops of food coloring (or to make custom colors like orange or violet mix half red and half yellow or half red and half blue, respectively. You'll want to mix the colors in fully, but you can also end up with a cool tie-dye effect if you choose not to.
- Take the bag off the cup and make sure that all of the air bubbles are out before you seal it.
- Once it's sealed, you'll want to lay it flat in the freezer overnight and while it won’t form completely into a solid (you should have an icy gel mixture), it should be ready to keep lunches cool by morning.
- You can keep these DIY gel packs or have your kiddos dispose them after they finish lunch. Luckily, these cost-effective options can be replicated and easily stored for quick backup use.
- Don't have dish soap? You can sub in rubbing alcohol or Karo syrup, which also do not freeze completely, but instead form a nice cold gel pack.
Other Ideas For a Cold Compress
Don't have time to DIY a gel or sponge ice pack? Never fear! Edible items can work well to keep perishables cold, as well!
- Freeze water bottles or natural juices and place them in your child's lunch. They'll thaw out by lunchtime and be ready for them to drink.
- If your kiddo likes yogurts, it's easy to pop them in the freezer for a snack that keeps their lunch cold as well.
- Freeze fruits like grapes and cherries. They'll keep your lunchbox extra cold and also taste great as an icy treat!
related articles
Liven Up Your Lunchbox
Brown bags begone! Hello, bento boxes, snazzy salads, and wraps. Find our favorite ways to think outside the lunch box.
5 Kid-Friendly Lunches
Tired of turkey sandwiches? Try these quick and nutritious lunch ideas from our Resident H-E-B Mom, Stacy.
Breakfast on the Go
See our no‑fail morning meal ideas. They are quick, simple and will make sure you start out the morning on the right foot.
Quick Weeknight Dinners
Don't be afraid to combine store-bought packaged foods to create a delicious and easy weeknight dinner. Prepare one the below recipes—from your freezer to your table in no time.
Design Your Own Notebooks - HEB
This school year, find ways to make your notebooks fun using patterned duct tape and colorful permanent markers.
Locker Organization Tips & Decorating Ideas
Find A+ ideas take little time and can pay off big time as your star student makes their way through the school year.
Back to School Survival Kit for High School
At H‑E‑B, we've got everything you'll need to pack an survival kit for your middle or high school student ‑‑ be it band‑aids or beauty products.
